Import of existing data into Joforce CRM #
You may have your customer information from a different source or newly migrated to Joforce CRM. Convert all your documents into a .CSV file. And import all your info in just a click. To import data inside Joforce CRM, navigate to the desired Module → click on the Import option in the top right. In the Import overlay,
Upload CSV File #
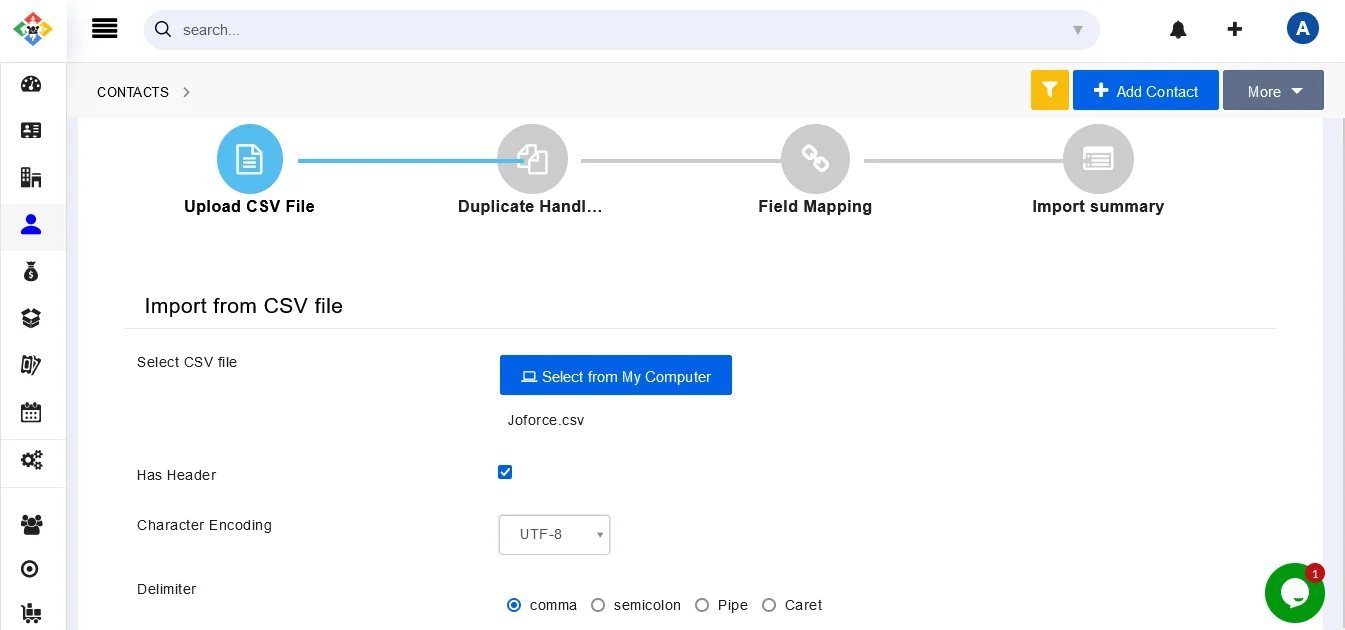
- Choose and upload your CSV from your computer
- Has Header – Enable the checkbox, if your CSV file has a header. This header field is mapped with the appropriate Joforce CRM fields.
- Character Encoding – Choose the CSV format either UTF-8 or ISO – 8859 – 1
- Delimiter – Select the delimiter by enabling the checkbox of any one of the four delimiters
- Comma
- Semicolon
- Pipeline
- Caret
- Hit Next.
Duplicate Handling #
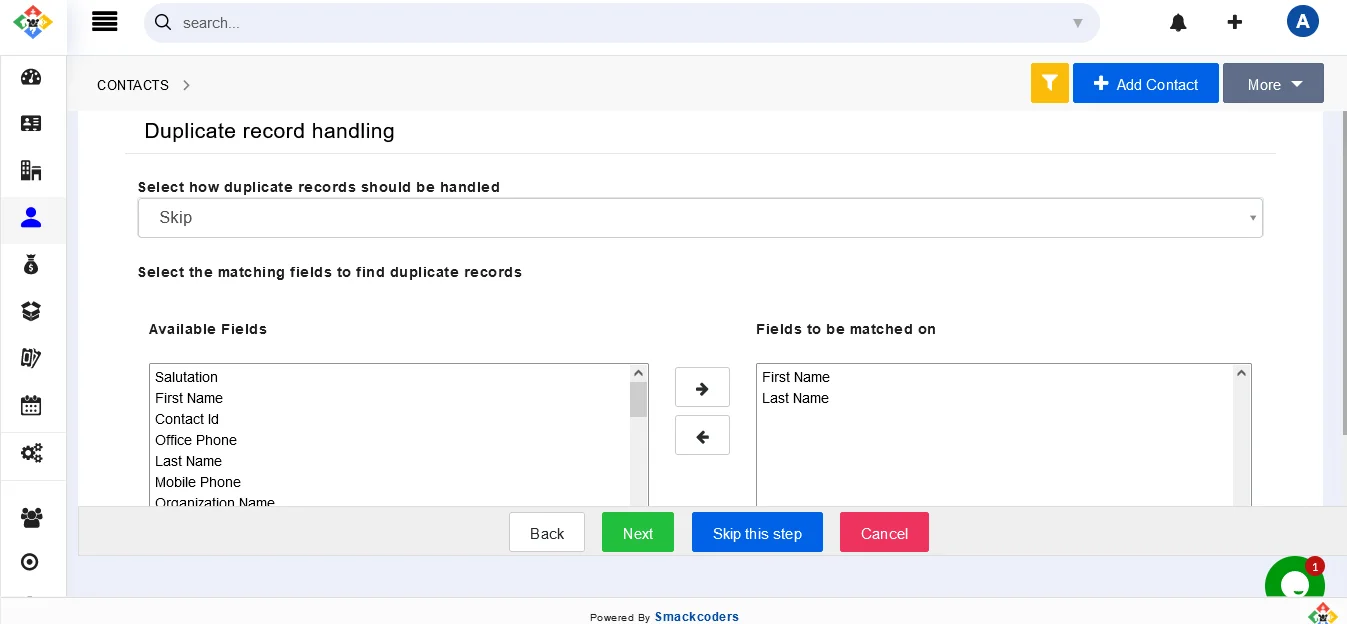
Joforce CRM lets you handle duplicates while importing the data. If you no longer need to check for duplicates you can navigate to the next step by clicking on Skip this step, else add the following
- Initially choose the action to be performed, when a duplicate detected
- Skip – To skip the duplicate records
- Overwrite – To overwrite the current value on the existing record
- Merge – To merge the new and already existing record
- Based on the fields selected Select the matching fields to find duplicate records section, the duplicates are identified
- Available Fields – Displays all the fields of the appropriate module
- Fields to be matched on – The list of selected fields to identify duplicates.
- To add a new field, choose the field from Available Fields and click on the Forward Arrow icon
- To delete a field, select a field from the Fields to be matched on click on the Backward Arrow icon.
- Click on Next
Field Mapping
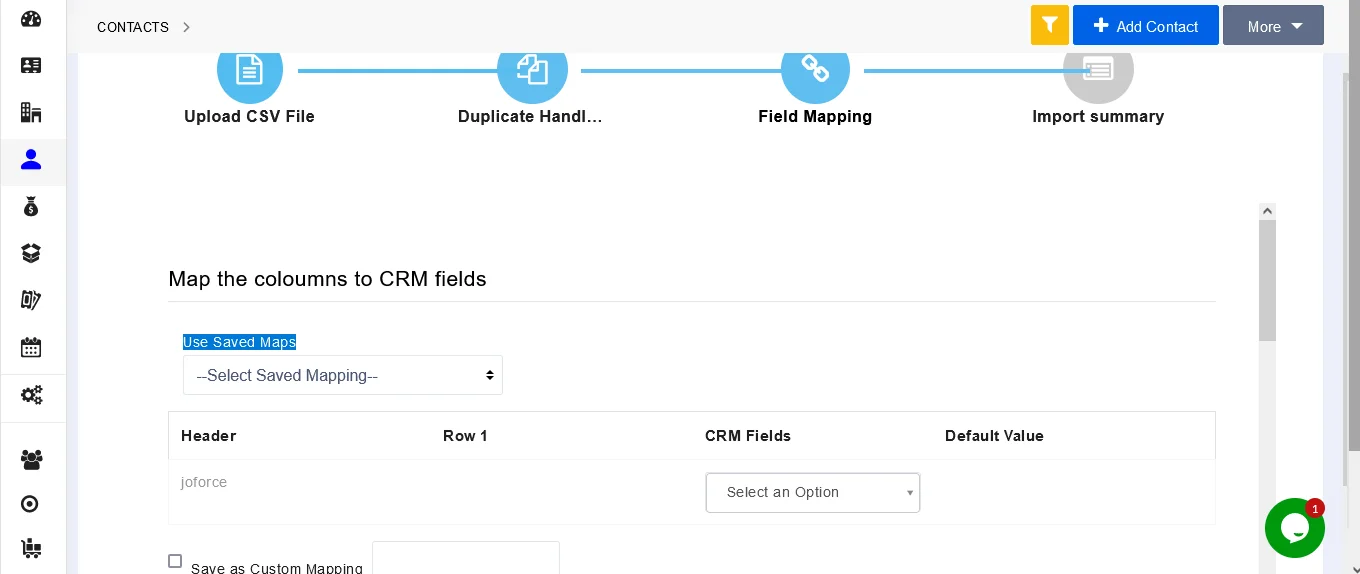
Map the CSV fields with the appropriate Joforce CRM fields.
- To save this current mapping as a template for future use, Enable Save as a custom Mapping checkbox and provide a name to your text box.
- You can use the saved template in the future using the Use saved Maps option.
- Note : Mapping is critical for the success of the import
Once done with all your settings, click on Import to import the data
Now you will get the import results, it shows the information like
- No. of records successfully imported
- No. of new records created
- No. of records overwritten
- No. of records skipped
- No. of records merged
From here itself, you can
- Import – start a new import
- Undo Last import – Deletes the records that are created during the last import
- Finish – complete the import


