As we all know picklist in the drop-down field, to choose one value from a set of different options. Joforce Picklist Editor lets you add new values, and edit/ delete the existing values. You can also rearrange the values as well.
Creating a custom picklist field in Joforce #
Besides the default picklist fields available in Joforce, you can also add a custom picklist to any module.
To create a custom picklist field,
- Navigate to the block you need to create a custom picklist field, click on the Layout Editor → Add Custom Field.
- In the create custom field overlay,
- Select Field Type – Choose Picklist from the dropdown
- Provide the Label and picklist values(length)
- Add a default value for your picklist.
- Once done, hit Save.
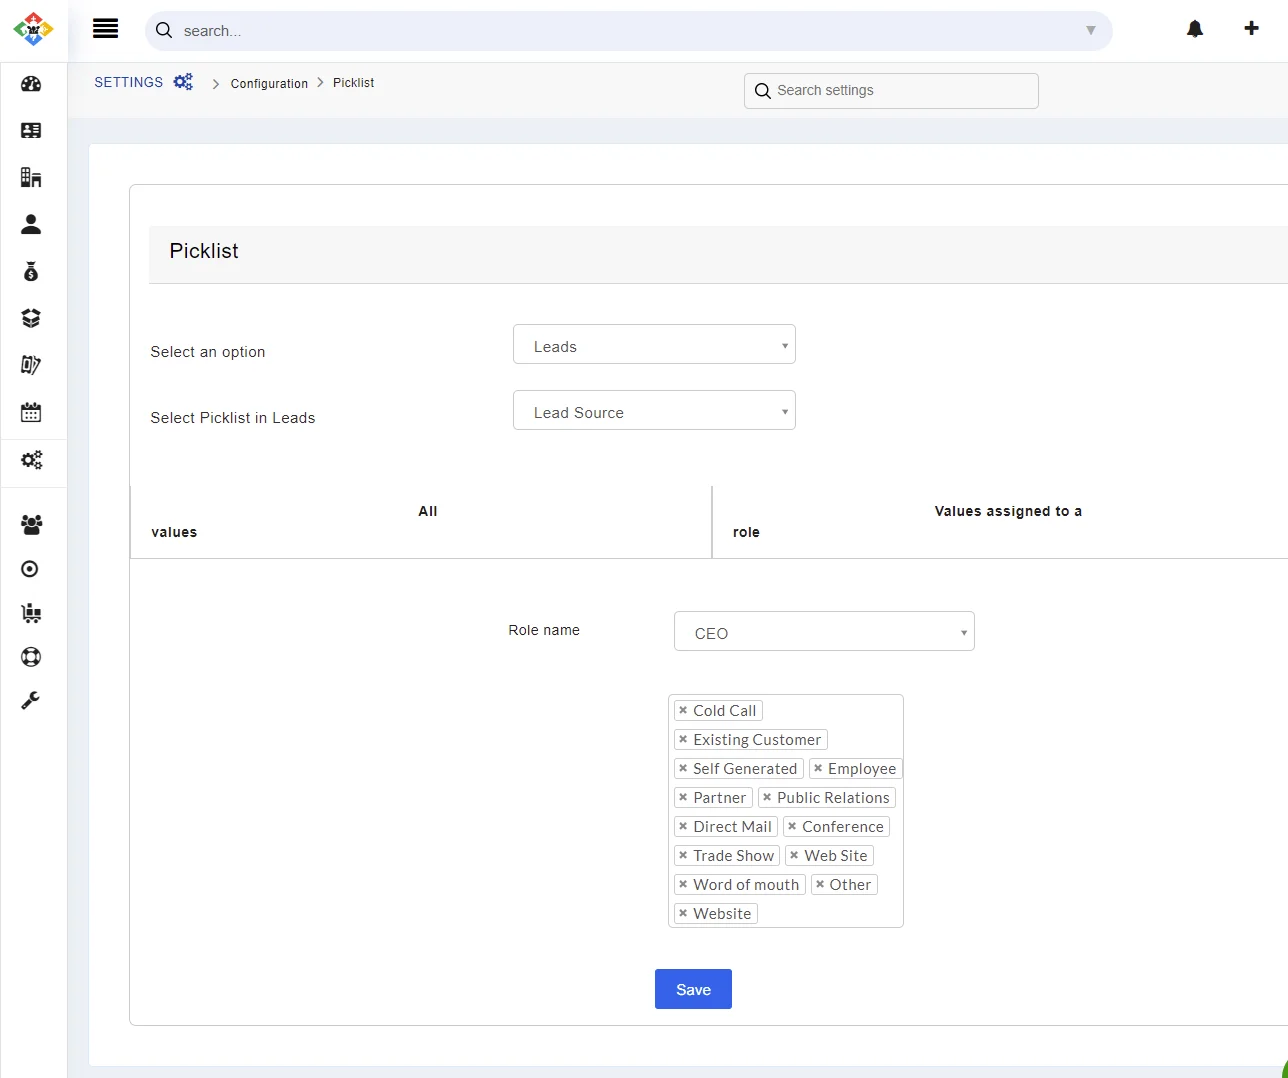
- Navigate to Left SideBar → Settings → Navigate to the Configuration section → Picklist Field Values.
Choose the desired module, in the Select an options
Section.
Customizing the picklist values #
With the Picklist Editor, you can add new values, modify existing ones, and delete and rearrange the existing picklist values. To customize your picklist values,
- Navigate to Left SideBar→ Settings → Navigate to the Configuration section → Picklist Field Values
- Choose the desired module from the drop-down
- The list of available picklist values for the selected module is displayed in the next menu. Choose one of the values from the drop-down of the Select Picklist in (module name)
- All the available values of the picklist are listed in the All Values section,
- From here you can easily Add, Edit, Delete and Reorder the picklist values.
- To Add new Picklist Values,
- Click on the Add Value on the top right of the tabulation
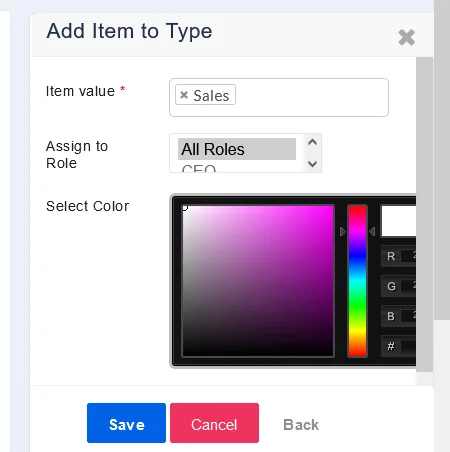
- In the Add Item to Salutation overlay, provide the name of the picklist value in the Item Value.
- Choose the role from the Assign to Role to grant your users to access the picklist values. (From custom picklist fields, this option will be enabled only when the Role Based Picklist checkbox is enabled)
- You can add color to your picklist using the Select option and choose the desired color palette
- Finally, click on Save.
- To edit Values,
- Hover over the desired picklist value. Click on the Edit icon on the right side.
- Make the necessary changes and hit Save.
- To delete the existing value,
- Hover on the appropriate picklist value. Click on the Trash icon on the right corner
- In the Delete Picklist Items overlay, Choose a value in Replace it with to transfer the responsibilities to another picklist.
- To rearrange the values,
- Just drag the values and drop them in the desired position.
- The changes are saved automatically
- In this way, you can easily customize your picklist values
Restricting the picklist values based on roles #
For all your picklist values, you can easily grant or revoke access to its values using Picklist Editor in Joforce.
- For default Joforce picklist values – The role-based assigning option is always enabled.
- For the custom Picklist field – The Role Based Picklist checkbox option should be enabled while creating custom picklist values. If it is disabled, you no longer restrict access to that picklist field, it will be visible to all your Joforce users.
- To restrict access,
- Go to Left SideBar→ Settings → Navigate to the Configuration section → Picklist Field Values
- Choose the desired module by choosing “Select an option from the drop-down
- The list of available picklist values for the selected module are listed in the next menu. Choose one of the values from the drop-down of the Select Picklist in (module name)
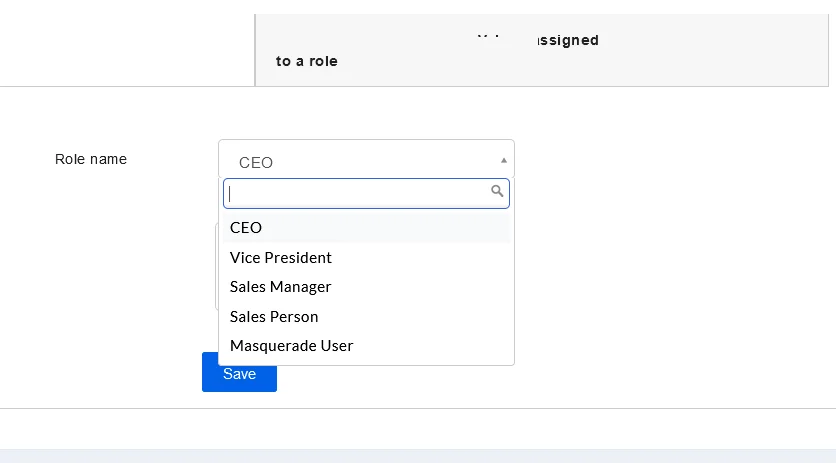
- Navigate to the Values assigned to a role menu.
- Now choose the Role Name and select the values to be displayed to the selected users in the next menu.
- Once done, hit Save.


